First, download Oracle VM Virtual Box from https://www.virtualbox.org/wiki/Downloads and install on your computer (both VirtualBox 4.2.8 for Windows hosts and VirtualBox 4.2.8 Oracle VM VirtualBox Extension Pack)
เปิด Oracle VM Virtual Box ขึ้นมา (สำหรับครั้งแรก แถบด้านซ้ายจะว่างเปล่า)
Next, start Oracle VM Virtual Box (For first time, the left panel will empty)

Click New on button bar then the below window will be appeared.
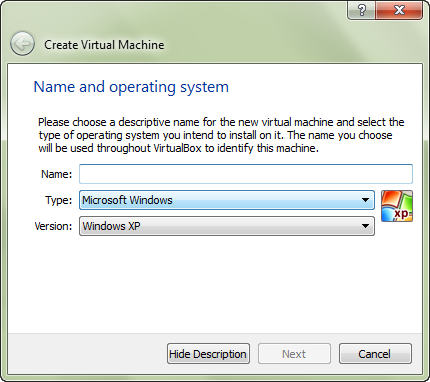
ใส่ชื่อของเครื่องเสมือนในช่อง Name แล้วทำการเลือกประเภทและรุ่นของระบบปฏิบัติการที่จะทำการติดตั้งบนเครื่องเสมือนจากช่อง Type และ Version ตามลำดับ
Add Name of new virtual machine then select Type and Version of operating system you intend to install on it
Add Name of new virtual machine then select Type and Version of operating system you intend to install on it

กดปุ่ม Next แล้วเลือกขนาดของหน่วยความจำสำหรับเครื่องเสมือน (ค่านี้สามารถปรับเปลี่ยนได้ในภายหลัง)
Click Next then select the amount of memory (RAM) (This can be change after this setting)

กดปุ่ม Next แล้วเลือก Create a virtual hard drive now
Click Next then choose Create a virtual hard drive now
Click Next then choose Create a virtual hard drive now

กดปุ่ม Create แล้วเลือกประเภทไฟล์ฮาร์ดไดร์ฟ (ค่าเริ่มต้นเป็น VDI)
Click Create then choose the hard drive file type (By default, VDI is chosen)

กดปุ่ม Next แล้วเลือกประเภทตัวเก็บข้อมูลของฮาร์ดไดร์ฟเสมือน (ค่าเริ่มต้นเป็น Dynamicall allocated)
Click Next then choose the storage type of virtual hard drive (By default, Dynamicall allocated is chosen)
Click Next then choose the storage type of virtual hard drive (By default, Dynamicall allocated is chosen)

กดปุ่ม Next แล้วพิมพ์ชื่อและเลือกขนาดของฮาร์ดไดร์ฟเสมือน
Click Next then type the name and select the size of the virtual hard drive
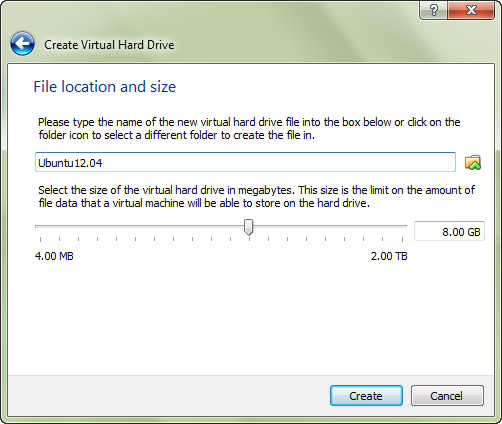
กดปุ่ม Create แล้วเครื่องเสมือนเครื่องใหม่จะปรากฏบนแถบด้านซ้าย
Click Create then new virtual machine will be appeared on the left panel
Click Create then new virtual machine will be appeared on the left panel

No comments:
Post a Comment